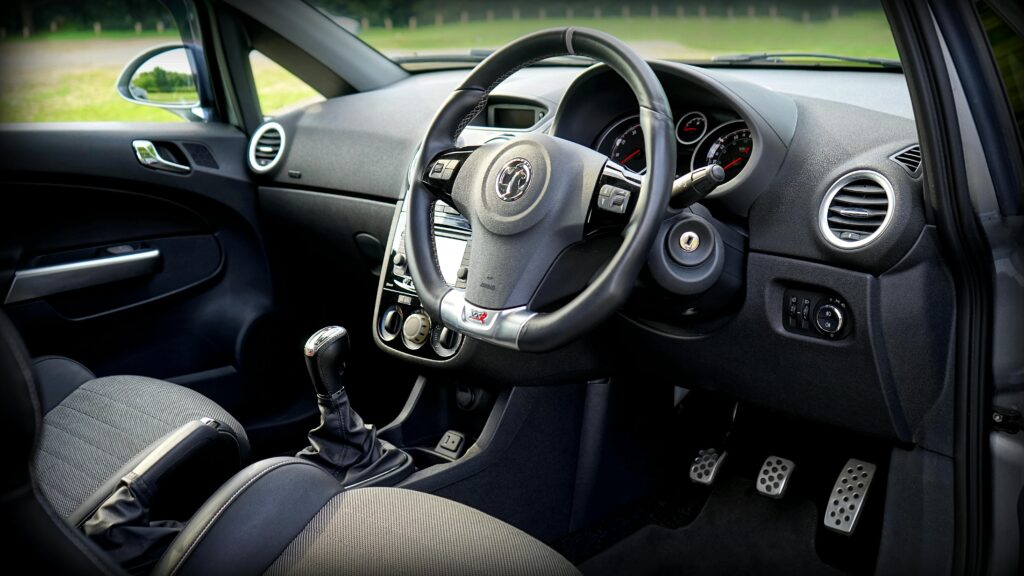

A full interior car detail goes far beyond a quick vacuum and dashboard wipe. When done properly, it transforms your vehicle’s cabin into a luxurious space—removing embedded dirt, eliminating odors, protecting premium materials, and restoring that showroom freshness that buyers and passengers immediately notice. Whether you’re preparing to sell, maintaining an investment, or simply reclaiming your vehicle’s original beauty, understanding the professional approach to interior detailing will help you achieve results that last months, not weeks.
- A full interior detail includes vacuuming, shampooing, protection treatments, and odor elimination
- Professional results require specialized equipment and products—vacuum power, pH-balanced cleaners, and ceramic sealants matter
- Average cost ranges from $300-$800 depending on vehicle size and condition
- Proper preparation and technique prevent damage to sensitive fabrics and finishes
- Professional detailing extends material lifespan by 40-60% compared to DIY maintenance
Table of Contents
Understanding Full Interior Car Detail
A full interior car detail is a comprehensive cleaning and protection process that addresses every surface inside your vehicle—from floor mats and carpets to dashboard, headliner, seats, door panels, and even air vents. Unlike a basic car wash, interior detailing targets accumulated dirt, allergens, and contaminants that regular vacuuming misses.
Professional interior detailing serves multiple purposes: it restores appearance, eliminates odors at the source, protects investment value, and improves air quality for your family. Statistics show that vehicles receiving professional interior detailing maintain resale value approximately 8-12% higher than those with standard maintenance.
What’s Included in a Full Interior Detail
Understanding what “full interior detail” actually includes helps you set realistic expectations and identify which services match your needs:
- Complete vacuuming with HEPA-filter equipped equipment to extract deep debris from carpets, mats, seats, and crevices
- Fabric shampooing using pH-balanced, professional-grade solutions that don’t leave residue or water spots
- Leather conditioning or protection treatments specific to your material type
- Dashboard and trim cleaning with proper products that won’t crack or discolor plastic
- Window and mirror cleaning for streak-free clarity
- Air vent detailing to eliminate dust and odor sources
- Odor elimination using enzyme-based treatments or ozone technology
- UV protection application to prevent fading and degradation
Pre-Detail Preparation & Assessment
The difference between good results and exceptional ones often comes down to preparation. Professional detailers invest 15-20% of total time in assessment and setup before cleaning even begins.
Initial Vehicle Assessment
Start by thoroughly inspecting the interior under good lighting. Note stains, odor sources, material types, and problem areas. This assessment determines which products and techniques you’ll need.
Create a mental map of your vehicle’s condition:
- Carpets: Are they heavily soiled, stained, or relatively clean?
- Seats: What material—leather, cloth, suede, or synthetic? Any visible damage?
- Odors: Identify the source—mildew, pet, smoke, food, or general staleness?
- Dashboard: Is it cracked, faded, or in good condition?
- Windows: Interior haze, water spots, or film buildup?
Preparation Steps
Before touching any cleaning solutions, follow this sequence:
- Remove all items from the vehicle—floor mats, door pockets, cup holders, trunk contents. This prevents damage and allows access to hidden dirt
- Shake out floor mats outside the vehicle thoroughly to remove loose debris
- Open all doors, trunk, and windows to ensure proper ventilation during cleaning
- Pre-treat stubborn stains with appropriate products and let them sit for 10-15 minutes before main cleaning
- Test cleaning products in inconspicuous areas first to ensure no discoloration or damage
- Set up equipment with easy access to power sources and water if using hot water extraction
Professional Vacuuming Techniques
Vacuuming is the foundation of any full interior car detail, yet most people rush through it. Professional vacuuming requires proper equipment, technique, and patience—typically consuming 20-30% of the entire detailing process time.
Equipment Matters More Than You Think
The difference between household vacuums and professional-grade equipment is significant. Standard household vacuums operate at 80-100 air watts; professional detailing vacuums deliver 150-300+ air watts with HEPA filtration.
| Vacuum Type | Air Watts | Filtration | Best For |
|---|---|---|---|
| Household Upright | 80-100 | Standard | Basic home cleaning |
| Shop Vac | 120-150 | Basic | Larger debris removal |
| Professional Portable | 200-250 | HEPA | Professional detailing |
| Professional Stationary | 300+ | HEPA+ | Heavy-duty restoration |
The higher suction power extracts deeply embedded dirt that shallow vacuuming leaves behind. HEPA filtration captures microscopic particles, preventing them from recirculating into the cabin.
Step-by-Step Vacuuming Process
Follow this sequence for thorough, effective vacuuming:
- Start with floor mats outside the vehicle. Use both sides of the head and work in patterns to agitate and extract debris
- Vacuum seats using upholstery attachments, working from top to bottom and between cushions where crumbs and debris accumulate
- Focus on crevices using crevice tools to reach between seats, under cushions, door pockets, and the center console
- Clean carpet in rows using overlapping passes, going both front-to-back and side-to-side for maximum extraction
- Pay special attention to high-traffic areas like the driver’s footwell, which collects the most dirt
- Use smaller attachments for air vents, dashboard crevices, and behind trim pieces
- Vacuum under seats thoroughly—this area accumulates significant debris and often requires a flat attachment or handheld unit
Deep Cleaning Every Surface
After vacuuming removes loose debris, the real restoration begins. Deep cleaning addresses embedded dirt, stains, and odors that simple surface cleaning misses.
Fabric and Carpet Shampooing
Professional shampooing differs significantly from DIY spot cleaning. The process uses specialized equipment that combines hot water, detergent, and powerful extraction—removing 60-80% more contaminants than standard methods.
Equipment options include:
- Hot water extraction machines (steam cleaners) that inject heated detergent solution and immediately extract dirty water
- Rotary extractors with rotating brushes that agitate fibers while spraying and extracting solution
- Foam cleaning systems that apply high-foaming detergent, agitate, then vacuum away the foam with dirt
The key difference is extraction power. Professional equipment typically recovers 70-85% of water used; consumer equipment recovers only 40-50%. This faster drying prevents mildew growth and allows your vehicle to be used sooner.
Leather and Vinyl Care
Premium leather and vinyl require specialized attention—standard fabric cleaners damage these materials by stripping natural oils or leaving soap residue that cracks the surface.
Proper leather cleaning includes:
- pH-balanced leather cleaners specifically formulated for automotive leather
- Soft-bristled brushes or microfiber cloths—never abrasive tools that scratch
- Light pressure and gentle circular motions to avoid damaging the surface
- Immediate drying to prevent water spots and allow proper conditioning
Vinyl seats in certain vehicle models benefit from pH-neutral cleaners and UV protection to prevent fading and cracking.
Dashboard and Trim Restoration
The dashboard collects dust, dead skin cells, and UV damage. Effective cleaning removes grime while protecting the plastic finish from cracking.
Dashboard cleaning approach:
- Use a microfiber cloth with a specialized dashboard cleaner—never silicone sprays that attract dust
- Work in sections, using both sides of the cloth to avoid spreading dirt
- Pay attention to air vents, which collect significant dust and require a brush or compressed air
- Clean all crevices where dust accumulates along the dash perimeter and around controls
- Wipe down steering wheel, door handles, and shift knob thoroughly
- Never use aggressive scrubbing that damages the finish—pressure cleaning is counterproductive
Window and Glass Treatment
Interior windows develop a film from off-gassing plastics, dust, and condensation. This haze reduces visibility and creates an unclean appearance.
Professional window cleaning uses pH-neutral solutions and proper technique to prevent streaking:
- Use dedicated automotive glass cleaners, not household products that leave residue
- Apply solution to a microfiber cloth, not directly to glass (which causes drips and over-saturation)
- Wipe in one direction, then buff dry with a clean microfiber cloth perpendicular to your first direction
- For stubborn film, use a clay bar specifically designed for glass before final cleaning
- Ensure complete drying—water spots are the most visible flaw in otherwise excellent detailing
Protection & Conditioning Treatments
The difference between a basic clean and a professional full interior car detail is protection. Applying proper treatments extends the life of materials by 40-60% and maintains that showroom appearance significantly longer.
Leather Conditioning and Protection
Leather is porous and naturally dries out, especially in vehicles with sun exposure. Proper conditioning restores suppleness and prevents cracking—extending the lifespan of leather seats from 3-4 years to 7-10 years with regular detailing.
Professional leather care uses two-stage approach:
- Deep conditioning with creams or balms that penetrate the leather and restore natural oils
- UV protection layer with sealants that block harmful rays and prevent fading
Quality leather conditioners cost $30-80 per bottle but treat multiple vehicles. Applying conditioning every 6-8 months maintains leather in exceptional condition.
Fabric Protection Treatments
Fabric protection uses nanotechnology to create an invisible barrier on upholstery fibers. This barrier repels liquids and prevents staining—protecting against coffee spills, pet accidents, and everyday wear.
UV Protection and Dashboard Sealants
Ultraviolet exposure degrades dashboard plastic, fading color and causing cracking. Professional UV protectants create a microscopic barrier that reflects harmful rays.
Benefits of dashboard sealants:
- Prevents fading and discoloration of dashboard and trim
- Reduces heat buildup by reflecting UV rays
- Provides water resistance that helps protect against spills
- Creates a clean, slightly glossy appearance (matte finishes also available)
- Lasts 6-12 months depending on sun exposure
Odor Elimination Techniques
Surface cleaning doesn’t address odor sources—they require targeted treatment. Professional detailers use three main approaches:
| Method | How It Works | Effectiveness | Cost Range |
|---|---|---|---|
| Enzyme Treatment | Breaks down organic matter causing odors | Very high for pet/food odors | $50-150 |
| Ozone Treatment | Oxidizes odor molecules in air and surfaces | Excellent for stubborn odors | $150-400 |
| Activated Charcoal | Absorbs odor molecules physically | Moderate, takes 24-48 hours | $30-80 |
| Air Ionizer | Uses negative ions to neutralize particles | Moderate, best for maintenance | $100-250 |
Many professional detailers combine methods for maximum effectiveness. For example, enzyme treatment targets upholstery odor sources while ozone treatment handles airborne particles and hidden areas like the HVAC system.
Common Mistakes That Ruin Results
Even with the best intentions, certain mistakes can damage your vehicle’s interior or compromise the results of a full interior car detail. Understanding what to avoid is as important as knowing what to do right.
Product and Technique Mistakes
Using the wrong cleaning products is the most common error. Household cleaners contain harsh chemicals that damage automotive materials:
- Glass cleaners with ammonia stripe tinted windows
- All-purpose cleaners leave residue on dashboards and cause cracking
- Silicone sprays attract dust and create slippery steering wheels
- Bleach-based cleaners fade fabrics and damage leather permanently
- Harsh brushes scratch leather and delicate plastics
Over-wetting fabric is another critical mistake. Excess moisture promotes mildew, creates water spots, and extends drying time. Professional cleaning uses controlled moisture application—just enough to dissolve dirt, then immediate extraction to remove the liquid.
Neglecting air vents and hidden areas means odors and bacteria remain. The HVAC system recirculates cabin air through contaminated vents, continuously reintroducing odors despite surface cleaning.
Time and Patience Mistakes
Rushing through detailing eliminates quality. Professional detailing takes 4-8 hours for a complete interior depending on vehicle condition because thoroughness cannot be hurried.
Common time-related errors:
- Single-pass vacuuming instead of multiple overlapping passes
- Skipping pre-treatment time for stains (which need 10-15 minutes to break down)
- Insufficient drying time before using the vehicle, causing water spots and mildew
- Applying protection treatments to wet surfaces, which prevents proper bonding
- Not allowing fabric protectant to cure (typically 24 hours) before exposing to moisture
Material-Specific Mistakes
Different materials require different approaches. Treating leather like carpet or vice versa causes permanent damage.
Leather mistakes:
- Using excessive water that causes swelling and water staining
- Applying fabric protectants designed for cloth (which leaves a plastic-like coating)
- Skipping conditioning, which causes cracking and peeling
- Using abrasive scrubbing that removes the protective top layer
Cloth upholstery mistakes:
- Under-wetting so dirt doesn’t fully dissolve (leaving soap residue)
- Using leather-specific products that don’t clean cloth effectively
- Not agitating fibers to release trapped dirt
- Applying leather conditioner instead of fabric protectant
Frequently Asked Questions
How long does a full interior car detail typically take?
A professional full interior car detail typically takes 4-8 hours depending on vehicle size and condition. Larger vehicles like SUVs and trucks take longer, while smaller cars may be completed in 4-5 hours. This extended timeline allows for proper vacuuming, shampooing, stain treatment, protection application, and drying.
How often should I get a professional interior detail?
Most detailing professionals recommend a full interior detail every 6-12 months for regular vehicles, or every 3-4 months if you have pets, children, or high-traffic usage. Vehicles with fabric protection treatments can extend intervals to 12-18 months, as the treatments make maintenance between details much easier.
Can I detail my car interior myself, or should I hire professionals?
While basic cleaning is possible at home, professional detailing achieves superior results because of specialized equipment, professional-grade products, and expertise in material care. Professional equipment provides 2-3x greater suction power and uses properly calibrated water temperature and extraction ratios—factors difficult to replicate with consumer tools. For luxury vehicles or valuable investments, professional detailing is recommended.
What’s the cost of a full interior car detail?
Full interior detailing costs range from $300-$800 depending on vehicle size, condition, and your location. Smaller sedans typically cost $300-500, while SUVs and trucks cost $500-800. Additional services like odor elimination, leather conditioning, or fabric protection add $100-300 each, and pricing varies significantly between regions. At Nascar Auto Care in the GTA, we offer competitive pricing with premium results.
A professional full interior detail restores your vehicle’s cabin to showroom condition—eliminating odors, protecting materials, and extending the lifespan of every surface. The investment in proper cleaning and protection today prevents costly repairs and material replacement tomorrow.
Final Thoughts on Interior Detailing Excellence
Achieving perfect results with a full interior car detail combines proper equipment, professional-grade products, correct technique, and patience. Whether you’re maintaining a daily driver or preserving a luxury vehicle, the principles remain the same: thorough vacuuming removes embedded debris, deep cleaning restores surfaces, and protection treatments extend material lifespan.
The GTA’s premier detailing specialists at Nascar Auto Care understand that interior detailing is both art and science. We combine state-of-the-art equipment with professional expertise to transform vehicle cabins into pristine, protected spaces. Whether you need comprehensive interior and exterior detailing, specialized odor elimination, or leather restoration, professional service delivers results that DIY methods cannot match.
Your vehicle’s interior deserves the same care and attention as its exterior. With proper detailing every 6-12 months, your cabin will maintain its showroom appearance, protect your investment value, and provide a healthier, more pleasant driving environment for you and your passengers.
Nascar Auto Care
Professional service available 24/7. Fast response, licensed technicians.

- Interior Detailing: What Happens Inside Your Car During a Full Deep-Clean — The 11-Step Process We Use
- Full Auto Detailing Cost in Mississauga — What You Actually Pay for Interior, Exterior, and Both Combined
- RV Detailing Cost in the GTA — What Full Interior and Exterior Protection Actually Costs by RV Length
- How To Detail Your Motorbike Like a Professional
- A Seasonal Guide to Car Detailing in Toronto’s Harsh Climate
This article was drafted with AI assistance to ensure factual accuracy.