If you’ve ever stepped back after washing your car and noticed a web of fine circular marks swirling across the paint under direct sunlight, you’re not alone. Knowing how to remove paint swirl marks and scratches is one of the most sought-after skills in automotive care — and for good reason. These defects can age a vehicle by years, destroy a showroom finish, and dramatically reduce resale value. The good news? With the right approach, most swirl marks and light scratches are entirely reversible.
Table of Contents
- What Are Paint Swirl Marks and Scratches?
- What Causes Swirl Marks on Car Paint?
- How to Assess the Severity of the Damage
- Tools and Products You’ll Need
- Step-by-Step: How to Remove Paint Swirl Marks and Scratches
- Machine Polishing vs. Hand Polishing: Which Is Better?
- How to Protect Your Paint After Correction
- How to Prevent Swirl Marks from Coming Back
- Frequently Asked Questions
Quick Summary — Key Takeaways
- Most paint swirl marks live within the clear coat layer and can be corrected with polishing.
- A dual-action (DA) polisher removes swirls significantly faster and more evenly than hand polishing alone.
- Paint correction typically involves a cut compound followed by a finishing polish — a two-step process.
- Sealing corrected paint immediately with a ceramic or graphene coating preserves the results long-term.
- The most common cause of swirl marks is improper washing technique — specifically automatic car washes and dirty wash mitts.
- Deep scratches that penetrate the base coat or primer require professional intervention, not DIY polishing.
What Are Paint Swirl Marks and Scratches?
Paint swirl marks are micro-scratches in your vehicle’s clear coat that create a distinctive spider-web or circular pattern when viewed under direct or artificial light. They are not always visible in overcast conditions, which is why many car owners are surprised to discover them when sunlight hits the hood at the right angle.
There is an important distinction between swirl marks, light surface scratches, and deeper paint scratches. Swirl marks are extremely fine and typically sit only within the top layer of the clear coat. Light scratches go slightly deeper but still remain within the clear coat. Deep scratches — also called base coat scratches or primer-level scratches — penetrate through the clear coat entirely and require a different level of correction.
Understanding this hierarchy is crucial before you reach for any polish or compound. Treating a deep scratch like a swirl mark will waste your time and may even worsen the damage.
What Causes Swirl Marks on Car Paint?
The most widespread culprit behind swirl marks is surprisingly mundane: the way you wash your car. Dragging a dirty sponge or cloth across a dry or lightly rinsed surface grinds fine particles of grit directly into the clear coat. This is why automatic tunnel car washes — despite their convenience — are widely regarded by detailing professionals as one of the single biggest sources of paint damage.
Here are the most common causes of swirl marks and light scratches on modern vehicles:
- Automatic car washes with rotating brushes or drag-through cloths
- Wiping a dry or dusty car with a dry towel or chamois
- Dirty wash mitts or sponges that haven’t been rinsed properly between passes
- Improper drying technique — using bath towels or rough terrycloth instead of microfiber
- Circular hand polishing motions with an abrasive product and too much pressure
- Tree branches, car covers, and other light abrasive contact over time
- Improper clay bar technique without adequate lubrication
How to Assess the Severity of the Damage
Before spending money on products or time on polishing, you need to determine exactly what type of damage you’re dealing with. The fingernail test is the industry-standard starting point.
Run your fingernail lightly and at an angle across the scratch. If your nail glides over it without catching, the scratch is within the clear coat and is polishable. If your nail catches — meaning it drops into the groove — the scratch has broken through the clear coat and likely requires professional paint correction or spot repainting.
Paint Damage Levels: A Quick Reference
| Damage Type | Layer Affected | Fingernail Test | Fix |
|---|---|---|---|
| Swirl Marks | Clear coat surface only | Nail glides over, no catch | Fine polish or finishing compound |
| Light Scratches | Mid to lower clear coat | Very slight catch | Cut compound + finishing polish |
| Deep Scratches | Clear coat + base coat | Nail catches clearly | Professional paint correction |
| Primer Scratches | Clear coat + base coat + primer | Deep groove, possible color missing | Spot repaint or panel respray |
Tools and Products You’ll Need
Having the right equipment dramatically affects the quality of your results. Using a high-quality polisher with the wrong pad, or a premium compound applied incorrectly, can still leave you with disappointing results — or worse, new damage.
Essential Equipment Checklist
- Dual-action (DA) orbital polisher — ideal for beginners and intermediate users; significantly safer than rotary polishers
- Cutting compound (medium-cut) — for removing deeper swirls and light scratches
- Finishing polish — for refining the surface after compounding and restoring gloss
- Foam cutting pad — used with compound for material removal
- Foam finishing pad — used with polish to refine and add clarity
- Microfiber towels (high-quality, 380–400 GSM or higher)
- Isopropyl alcohol (IPA) solution — for decontaminating and inspecting the paint after polishing
- Clay bar and lubricant — for decontaminating the surface before polishing
- Paint depth gauge (optional but recommended) — to measure clear coat thickness before and after
- LED or halogen detailing light — for inspecting defects accurately
Step-by-Step: How to Remove Paint Swirl Marks and Scratches
This is the core process used by professional detailers to remove paint swirl marks and scratches and restore a like-new finish. Follow each stage carefully — skipping steps is the single most common reason DIY correction attempts fall short.
Step 1: Thorough Pre-Wash and Decontamination
Begin with a proper wash using the two-bucket method — one bucket for your shampoo solution and one for rinsing your mitt. Use a pH-neutral automotive shampoo and a clean microfiber wash mitt. Rinse the vehicle thoroughly from top to bottom.
After washing, perform an iron decontamination using a dedicated iron remover spray. Iron fallout and industrial contamination bond to clear coats and will interfere with polishing if not removed. Follow with a clay bar treatment, working section by section with plenty of lubricant. The clay bar removes embedded surface contaminants that washing alone cannot lift.
Step 2: Dry and Inspect the Paint
Dry the vehicle using clean, plush microfiber drying towels — preferably a dedicated waffle-weave or twist-pile drying towel rated above 400 GSM. Inspect every panel under a high-output detailing light, noting the location and severity of swirls and scratches.
Use your IPA wipe-down (50% IPA, 50% distilled water) to remove any remaining residue and get a true read of the defects you are working with.
Step 3: Tape Off Vulnerable Areas
Use detailing masking tape to protect rubber trim, plastic emblems, window rubber seals, and painted bumper edges. Compound and polish can stain porous rubber and plastic permanently if it gets worked in. This step takes ten minutes but saves a significant amount of cleanup time.
Step 4: Apply Cutting Compound (Stage 1 Correction)
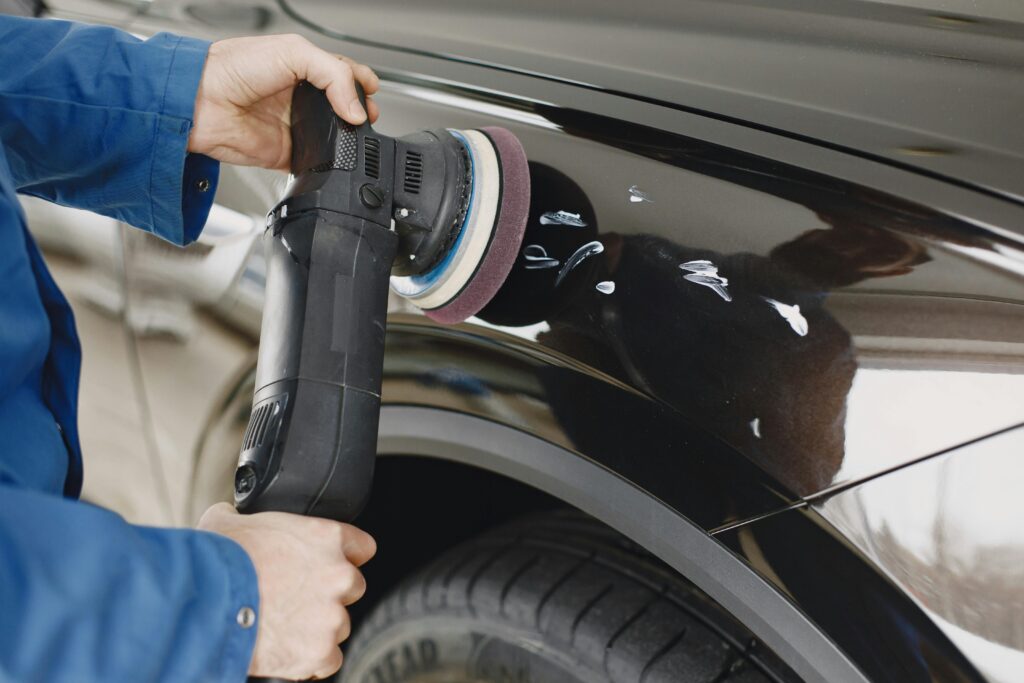
Attach your foam cutting pad to your DA polisher. Place 4–5 pea-sized drops of cutting compound onto the pad, then spread the product across a 45 x 45 cm (approximately 18 x 18 inch) test section at low speed (speed 1–2) before increasing to working speed (speed 4–5 on most variable-speed machines).
Work in overlapping passes — four to six slow, controlled passes across the panel section, maintaining light to moderate downward pressure. The compound will work itself in and turn clear or near-transparent as the abrasives break down. Buff off the residue immediately with a clean, folded microfiber towel.
Inspect the section under your detailing light. You should see a dramatic reduction in swirl marks and light scratches. If some remain, repeat the stage on that section before moving on.
Step 5: Refine with Finishing Polish (Stage 2 Correction)
Switch to your foam finishing pad and a quality finishing polish. Repeat the same working technique — spread at low speed, then work at speed 4–5 with moderate passes. The finishing polish removes any micro-haze, light marring, or buffer trails left by the cutting compound and brings the paint to a refined, high-gloss finish.
After buffing off each section, perform an IPA wipe-down to strip any oils from the polish and inspect the results under strong light. The paint should appear clear, deep, and free of swirl marks at this stage.
Step 6: Full Panel Inspection and Touch-Ups
Walk around the entire vehicle with your detailing light, inspecting every corrected panel at multiple angles. Mark any remaining defects with masking tape and return to those spots with your compound or polish as needed. Perfectionists may require a third refined polish pass on darker-colored vehicles where swirls are most visible.
“Paint correction is 80% preparation and 20% polishing. The quality of your decontamination and inspection stages determines how good your final result will be — not just the machine or the product.”
Machine Polishing vs. Hand Polishing: Which Is Better?
This is one of the most common questions in DIY detailing, and the honest answer is that a dual-action polisher outperforms hand polishing in almost every scenario involving swirl marks and light scratches.
| Factor | DA Machine Polish | Hand Polish |
|---|---|---|
| Defect Removal Rate | High — removes 70–95% of clear coat swirls | Low — effective mostly on very fine haze |
| Time Required | 2–5 hours for full vehicle | 6–12+ hours for full vehicle |
| Consistency | Very consistent, even coverage | Inconsistent, prone to pressure variation |
| Risk to Paint | Low (DA polisher) / High (rotary polisher) | Very low — limited material removal |
| Best For | Full correction, swirl removal, scratch removal | Light haze, minor maintenance polishing |
| Skill Level Required | Beginner to intermediate | Beginner |
Hand polishing with a quality applicator and finishing polish can mask very fine surface haze when done correctly. However, it lacks the rotational energy to actually level the clear coat and eliminate the microscopic peaks and valleys that create visible swirl patterns. For any meaningful paint swirl and scratch removal, invest in — or rent — a dual-action polisher.
How to Protect Your Paint After Correction
Corrected paint is raw, unprotected clear coat. Without an immediate protective layer, it will begin accumulating new damage from the very first wash. This step is non-negotiable if you want your correction results to last.
Your protection options range from traditional carnauba wax (which offers 1–3 months of protection) to professional-grade ceramic coating and the emerging gold standard, graphene coating.
Protection Options Compared
- Carnauba Wax: 1–3 months protection, easy to apply, limited chemical and UV resistance. Good for occasional use.
- Paint Sealant: 6–12 months of synthetic protection, stronger than wax, good value for DIY users.
- Consumer Ceramic Coating (DIY): 1–3 years of protection, 9H hardness rating, significantly more durable. Requires careful application.
- Professional Ceramic Coating: 3–7+ years, genuine nano-ceramic silica bond to the clear coat, extreme hydrophobicity, and superior chemical resistance.
- Professional Graphene Coating: 5–10 years, the current pinnacle of paint protection. Superior anti-water spotting, lower surface temperature, and enhanced scratch resistance compared to ceramic.
For vehicle owners who have just invested in professional paint correction services, a ceramic or graphene coating is the most logical next step to protect that investment for years rather than weeks.
How to Prevent Swirl Marks from Coming Back
Removing swirl marks is satisfying — but preventing them from returning requires a permanent change in how you wash and maintain your vehicle. Most swirl marks are entirely preventable with the correct technique and tools.
- Never use an automatic brush car wash. The rotating brushes are universally recognized by detailing professionals as swirl machines. Touchless washes are the acceptable alternative if hand washing is not possible.
- Use the two-bucket wash method. One bucket with shampoo solution, one with clean water for rinsing your mitt after every pass. This prevents grit from being dragged back across the paint repeatedly.
- Always use a clean, high-quality microfiber wash mitt. Wash your mitts after every use and inspect them for embedded debris before each wash.
- Never wipe a dry or dusty car. Always rinse first. Even a light layer of dust contains fine grit particles that will scour the clear coat when pushed by a cloth.
- Dry with plush microfiber towels or an air blower — never terrycloth, paper towels, or a synthetic chamois.
- Maintain a protective coating. Wax, sealant, ceramic or graphene coatings all create a sacrificial layer above the clear coat. Swirls form in the coating first, protecting the paint beneath.
Frequently Asked Questions
Can you permanently remove paint swirl marks and scratches from a car?
Yes — swirl marks and light scratches that are contained within the clear coat can be permanently removed through paint correction. The process involves using abrasive compounds and polishes to level the clear coat surface, eliminating
- A Customer Asked: “Will Paint Correction Remove the Scratches on My Black BMW Before I Sell It?” — The Full An
- How To Get Rid of Swirl Marks With Paint Correction Services in the GTA
- How To Protect Your Car’s Paint This Winter in the GTA
- How To Restore Faded Paint on Your Vehicle With Professional Paint Correction
- A Seasonal Guide to Car Detailing in Toronto’s Harsh Climate
This article was drafted with AI assistance to ensure factual accuracy.